How to Make the Perfect Gingerbread Cookies!
December 6, 2021
Want to make Santa the perfect Gingerbread cookies? The holidays are here and it’s time to make some Christmas themed cookies! Tis’ the season of the GingerBread cookie! It’s time to curl up in a Christmas pattern blanket, drink hot cocoa, and eat Christmas cookies. You want your cookies soft in the center, crispy at the edges and perfectly gingery! They can come in all shapes and sizes with an array of different colors of icing. It’s the perfect time to make a new Holiday family tradition! So put on your Christmas playlist and get the oven preheated!
Gingerbread Cookie Recipe:
Prep Time: 4 hours Cook Time: 10 minutes
Total Time: 4 hours, 30 minutes Yield: 24 cookies
Ingredients for Cookies:
- 10 Tablespoons of room temperature Butter
- ¾ cup of packed light or dark brown sugar
- ⅔ cup of Molasses
- 1 large egg, at room temperature
- 1 teaspoon of pure vanilla extract
- 3 ½ cups all purpose flour
- 1 teaspoon of baking soda
- ½ teaspoon of salt
- 1 tablespoon of ground ginger
- 1 tablespoon of ground cinnamon
- ½ teaspoon of allspice
- ½ teaspoon or ground cloves
Step 1: Ready a large bowl and a mixer (Hand mixer or stand mixer will work) Vigorously beat butter until smooth and creamy. Add brown sugar and molasses on medium speed until combined and creamy looking. Next, beat in egg and vanilla at high speed for 2 minutes. The butter may separate- that’s okay!
Step 2: In a separate bowl, whisk together flour , baking soda, salt, ginger,cinnamon, allspice, and cloves until combined. On low speed, slowly combine dry ingredients into butter mixture. The cookie mixture should be thick and slightly sticky.
Step 3: Divide dough in half and place each onto a large piece of plastic wrap. Wrap each one up tightly and pat down to create a disc shape. Chill disc for at least 3 hours and up to 3 days. Chilling is mandatory.
Step 4: Preheat oven to 350°F. Line 2-3 baking sheets with parchment paper or silicone baking mats.
Step 5: Remove one disc of cookie dough from the refrigerator. Generously flour a work surface, your hands, and the rolling pin. Roll out disc until ¼ inch thick.
*Tips for rolling- the dough may crack and crumble as you roll. Additionally you can use your finger to mold the cracks back together. The first few rolls are always the hardest since the dough is so stiff, but re-rolling the scraps is much easier. Cut into shapes with cookie cutters. Place shapes 1 inch apart on prepared baking sheets. Repeat with rolled scraps and remaining disc.
Step 6: Bake cookies for about 9-10 minutes. If your cookie cutters are smaller than 4 inches, bake for about 8 minutes. If they are larger than 4 inches, bake for about 11 minutes. Be sure to rotate the baking sheet occasionally in the oven to keep cookies from burning.
Step 6: Allow cookies to cool for 5 minutes on the cookie sheet. Transfer to a cooling rack to cool completely. Once completely cool, decorate as desired.
Step 7: Cookies stay fresh covered at room temperature for up to 1 week.
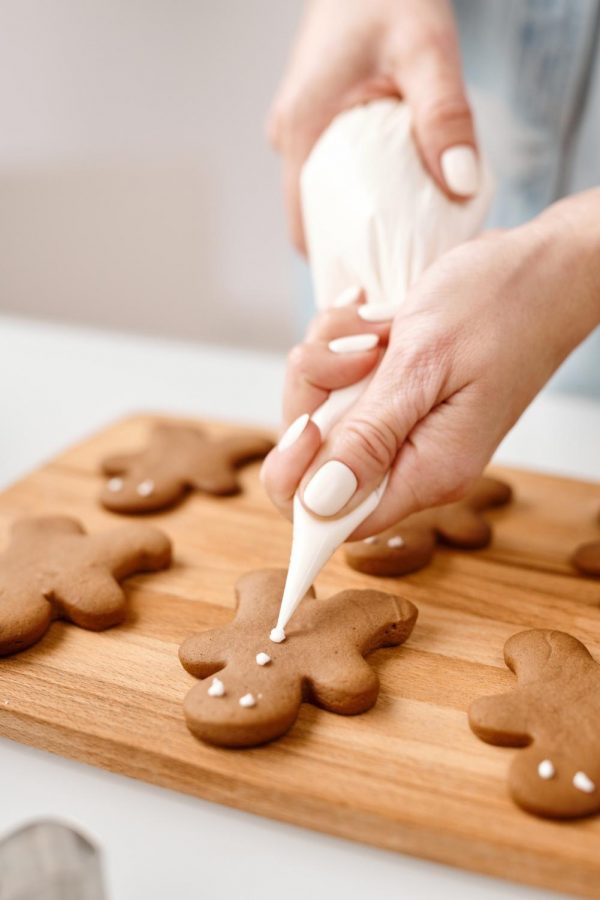
Decorating your Cookies:
You want a smooth and perfect icing to go onto your chilled cookies. You are going to want lots of piping bags, piping tips and food coloring, of course! With some decorations you may want to outline the cookie then flood the inside with icing. To even up the icing in the middle you can use a toothpick. You will want to use a tiny piping tip to create those perfect lines on your cookies. For beginners, you scrape all of your icing into a bag after securing the icing tip. Then when actually icing the cookie you want to add medium pressure to the bag to lightly ease out the icing. Going too fast may cause the icing to go crazy, so you must find the perfect rhythm for your decorating. You can give your gingerbread men gooey little smiles and spiffy ties. Then of course, you need a lot, I mean LOTS, of holiday sprinkles. I’m talking snowflakes and glitter and red and green, and all of the favorites. You want those cookies to look like Santa’s workshop after Christmas, a crazy holiday mess!!
Prep Time: 5 minutes Total Time: 5 minutes
Yield: 3 cups
Ingredients for Royal Icing:
- 4 cups of sifted confectioners sugar
- 3 tablespoons of meringue powder
- 9-10 tablespoons of room temperature water
- Food coloring (Optional but definitely recommended)
Step 1: Pour confectioners sugar, meringue powder, and 9 tablespoons of water into a large bowl. Using a hand mixer or stand mixer with a whisk attachment, beat icing ingredients on high for about 1.5-2 minutes. If the icing is too thick add the extra tablespoon of water. The more you beat the icing the thicker it gets, so if your icing is too thin, beat it for a longer time to introduce more air, or you can add more sugar.
Step 2: Thin layers of icing dry in about 2 hours, and if applied very thickly it will take longer. Placing cookies in the fridge will speed up the process.